

If you’re new to slacklining or are just learning how to set a slackline up yourself, there are a number of things that you might do wrong that you need to avoid.
Here are 10 slackline setup mistakes to avoid to ensure it’s set up properly each time.
Setting the slackline up too high and too long
Don’t choose a slackline that is too long when starting out. Once the slackline is set up, it should be high enough off the ground that the line doesn’t touch the ground when standing on it.
But it should also not be so high that it’s difficult to climb on as it increases the chance of injury when you fall off. Because you will fall off especially when you’re a beginner.
Solution: When you’re beginning, use a 5m slackline or thereabouts. Don’t set your sights too high as it can be a big enough challenge to walk that distance when you’re first starting out. Longer slacklines can have more sway especially if they aren’t set up tight enough which makes it harder still.
Also, set the slackline up so that it’s around knee height when set up. Any higher and you are making it more difficult to climb on. Plus it’s a longer way down when you fall.
Not paying attention to abrasion damage to the slackline
The nylon or polyester material of a slackline can get worn and damaged by rubbing against a tree or pole or other fastening object with a rough surface. This can dramatically affect the slackline’s ability to safely hold your weight.
The friction of the slackline against a hard surface like tree bark or a rough pole can damage it over time.
Solution: You should be using tree protection which will protect not only the tree but your slackline so the damage is likely to be from a pole or other inanimate object.
No access to tree protection at the time? Wrap the line slightly higher or lower if possible to avoid damage from a tree or pole.
Check out my article called Can You Leave A Slackline Up Overnight? (5 Reasons It’s Not A Good Idea) for another perspective on slackline material damage.
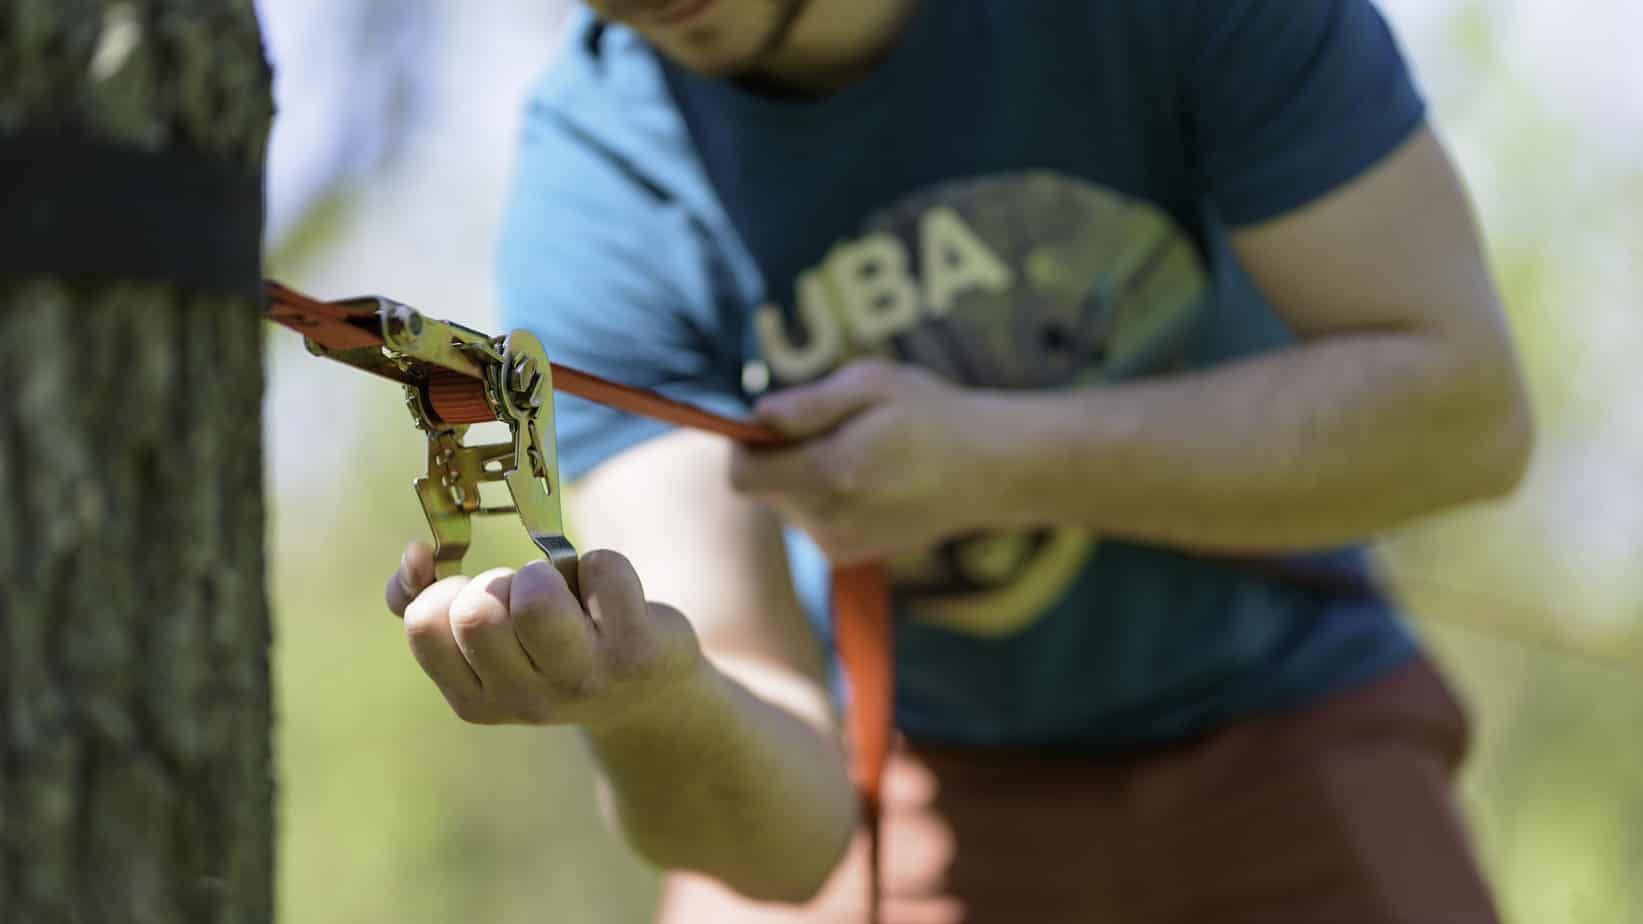
Setting up the ratchet too far away from the pole
The ratchet is only able to hold so much of the slackline as we’ll see below in more detail so it’s important to wrap the slackline enough times around the tree or post you’re using first before ratcheting it up.
Solution: Depending on how long your slackline is, you’ll want to wrap the slackline around the tree or post several times before tightening it up with the ratchet. The ratchet should be at the end of the slackline and not the middle when you’re finished.
Setting up the ratchet sideways
When you’re looping the slackline around the tree or post that you’re using, make sure that the slackline does not fold over and is tightened flat against the surface. If you don’t do this, you run the risk of having the slackline on its side rather than flat which will negatively how it sits when under tension.
When under tension the slackline should be perfectly flat and parallel to the ground.
Solution: The ratchet should be set up in a way that the slackline is parallel to the ground and not on its side at any point.
Cranking the ratchet too early
The ratchet can only hold so much of the slackline. If you start using the ratchet too early, you will run out of room on the ratchet and may not be able to get the desired tension. When the slackline is too slack you won’t be able to slackline properly and may have difficulty tensioning up the line to the necessary degree.
Solution: Tension the line manually until it is relatively tight and then use the ratchet to achieve the desired tension that you can’t do by hand.
Slackline goes sideways into the ratchet
This is a problem that can occur with anything that uses a ratchet, gear loop or tension lock such as a backpack, rucksack or other tightening system that holds something in place.
Solution: Before you start ratcheting, make sure the slackline goes in straight and centered. Center the line in the middle of the ratchet and ensure it goes in perfectly straight. The line should be in the middle of the ratchet before and during tensioning.
Failing to properly close the ratchet

Once you’re done tensioning your slackline to the desired degree, you have to lock the ratchet handle in place typically by pulling it upwards so that it locks into place and is parallel with the slackline.
Depending on your ratchet model, it will have a brake(s) so properly engaging the ratchet handle helps to ensure the brake(s) can do its job which is to stay tight and keep the slackline tightly tensioned.
Solution: Lock the ratchet handle in place properly when you are done tensioning the line.
Failing to check that each ratchet pin is behind the teeth
Your ratchet works with a circular set of metal teeth. Each side of the ratchet has a metal pin which locks into the teeth. Every time you crank the ratchet the metal teeth rotate to tighten the slackline while also locking it into place with the teeth. So the teeth prevent the slackline from becoming loose again.
While the two pins work in conjunction with one another, the pins have the ability to fall out of line slightly. One pin might be locked in properly into the teeth but the pin on the other side may not be.
Solution: When ratcheting your slackline, listen for the distinctive sound of the metal pins falling into place in the teeth and ensure that both pins are locking into place properly. If you see one (or both) pins are not locking into the teeth in place, try ratcheting very slowly and the pins should be able to fall into place correctly.
Putting your free hand near the ratchet while tensioning
When pumping the ratchet and the slackline becomes tighter, obviously the tension increases which increases the danger. Anything under a high degree of tension has the ability to cause damage if it suddenly loosens.
Solution: It’s important to either keep your free hand away from the ratchet and slackline as you’re ratcheting or to keep both hands on the ratchet handle if you aren’t strong enough to do it with one hand.
Check the ground around you before slacklining
Before you begin slacklining, double check the ground around and underneath the slackline for debris especially if you’re going barefoot. Be on the lookout for broken glass, stones or other debris or even garbage that you’d rather not step on.
Solution: If you’re concerned about stepping on something, consider slacklining with shoes. Still, it’s a good idea to check the ground around the slackline to make sure the area is clean before you step on the line.
Recent Posts
Slacklining is a challenging activity that involves walking, balancing, and performing tricks on a flat piece of webbing stretched between two anchor points. It has become increasingly popular in...
Slacklining is a fun and challenging way to improve your balance, core strength, and overall fitness. Whether you're new to slacklining or a seasoned pro, incorporating a slackline workout routine...